Hi, all - a common question we get from admins is how to set up a new G4 Google Analytics property now that they are
sunsetting Universal Analytics, such that it works with Google Tag Manager and sends analytic data back to Google so you can measure site traffic, bounce rates, and a myriad of other numbers. Below is a step-by-step guide to ensure your data is being measured properly.
- Set up a Google Analytics account.
- Create your G4 property for Google Analytics.
- Go to tagmanager.google.com and sign in.
- Click on Google Tag Manager.
- Log in with the same credentials you use to get into your Google Analytics account.
- Click Create Account.
- Enter Account Name > Continue > Enter Container Name > select Web > Create.
- Click Yes in the upper right.
- This will pop up over to a modal titled, "Google Analytics: GA4 Configuration."
- Enter your G4 property tag in the Measurement ID field (usually formatted like G-XXXX) and Save.
- Click on the gray circle under Triggering and select All Pages.
- Save.
- When the modal pops up to Rename Tag, click Save.
- Click the SUBMIT button in the upper right corner.
- Click PUBLISH in the upper right corner.
- When the Container Version Description, click Skip.
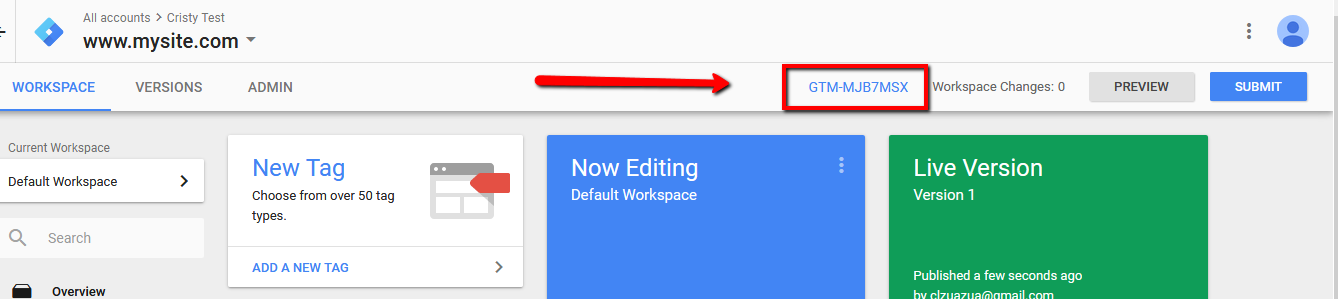
- Click over to the Workspace link in the upper left corner.
- Copy the GTM code in the Workspace area, here:
- Go to your community site and log in as a Super Admin.
- Go to Admin > Pages > Design > Advanced Settings and paste that code into the Google Tag Manager section.
- Click Save.
Whew - that was a lot of clicking! While it looks like a ton of steps, once you get in there, the process is actually fairly quick. Once all that's done, data from your community site will be sent to Google, and you'll be good to go!
Google Tag Manager on Select Microsites
If you're only looking to apply Google Tag Manager tracking to one specific microsite and not all of your sites, simply follow steps 1-25, then go into the first page of
Site Setup. Scroll to the bottom of the page and you'll see a field for your Google Tag Manager code. Paste it in there, then click
Finish to save it.
The decision to segment out individual microsite data really varies by organization; if you want all the data in one bucket and find it more efficient to sort that way as one user, then that's the best way to go. If you'd rather have multiple accounts sectioned out and pull the data per microsite without mixing the data with other microsite data, that can be more effective based on your management setup. In this case, there is no set best practice, but rather the best setup is whatever makes you and/or your team most efficient.
Custom Google Tag Manager Configurations
For more ideas about what you can measure and accomplish with Google Tag Manager, I'd recommend checking out the
official Google Tag Manager documentation section. Because this is a third-party software, a segment of our clients who are looking for increased customization have hired consultants to help them with more advanced Google Tag Manager configuration, and while we recommend this, we don't currently have any vendors we endorse for this service. If you're looking to know who other clients have used, I'd recommend posting to
Online Community Product & Support community and asking around.